This post was written as GoodEggFoodie.com. Please excuse any wonky formatting. Visit the homepage SHE-EATS.com for the latest, shiny new content.
Three methods, one week. It’s now or never…
Check out the introduction to the project here.
So it is day one of baking and first bread I am trying is with fresh yeast.
I got the book Dough by Richard Bertinet a couple of years ago and although the recipes all specified fresh yeast, I could never get any so substituted dry yeast instead. There was also a DVD which explained the baker’s unique method of working the dough, but I just looked at the pictures in the book instead. It never seemed to work out! So now things are different. I can get fresh yeast easily from the new Morrisons supermarket which is 2 minutes away. I have bought digital scales so I can weigh 10g of fresh yeast instead of weighing out 20g on my old ones and roughly halving it (oh yes, I really did that). I will weigh my water as he suggests (and I have in the past scoffed at). And most importantly of all, I have watched the DVD and taken some notes. You can watch him work the dough here on the Guardian website.
So what is this magic method? Basically you have to get your hands under the dough, slap it back on the worktop and then stretch and lift. It is much easier to understand after you have watched him do it rather than trying to follow the pictures in the book. Oh, and there is minimal flour on the worktop. The idea is that you get a soft, pliable dough not hardened by additional flour and with lots of air going on inside.
That’s the theory anyway.
Here’s What Actually Happened…
The Bertinet Basic White Bread Recipe
- 10g fresh yeast
- 500g strong white flour
- 10g salt
- 350g water at room temperature
In the end I made up three batches of dough – this was not my original plan but I panicked a bit after the first batch.
Batch 1
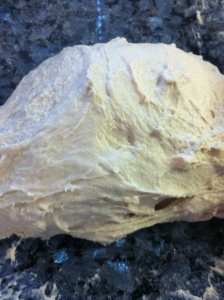
I make up the dough and start working it on the top (which is granite so quite cold). And more, and more…After 30 minutes it is still sticky although it does have some bounce. I have an appointment to go to so I decide to rest it and see what happens. Well nothing much does happen. After an hour it has risen, but only slightly. It takes two hours for it to double in size.
Batch 2
Over lunch I re-watch the DVD to make sure I am doing it correctly (I am), then decide to give it another go. Again, I work the dough in Bertinet’s way for about 25 minutes. It is coming away from the worktop easier but is still sticking to my hands. Why isn’t it going smooth? The desire to throw flour over everything is strong but I resist. I give it another few minutes, then roll it and leave it to rest. Again, it takes a couple of hours to double in size.
Whilst it is resting, I do question why I am doing this method with my hands when it obviously isn’t working for me and I have a perfectly good Kitchen Aid with a dough hook. I think that I have it in my head that to use the mixer is cheating somehow and it won’t be made by me. But you know what, if it tastes good, why am I worried? So I decide to put all my self-imposed bread snobbery to one side and do one more batch.
Batch 3
Last batch today, I have a life and the kitchen is starting to resemble a flour explosion. Monsieur Bertinet says that if you use a mixer then 6-7 minutes on speed number two. So there you go, he tells you how to do it in the mixer so it must be ok. I mix and shape it and leave it to rise. It doesn’t rise. At all. Bugger. Binned.
The Results
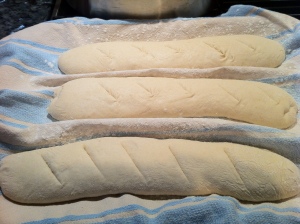
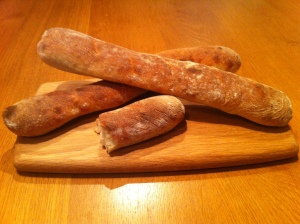
Batch one I make in to baguettes following the method in the book. I only get three out of my batch and cook them for 12 minutes. They come out golden brown. They taste good too- chewy like proper baguettes. I am pleasantly surprised as this is the batch which I had no faith in and lead me to making up the two others!
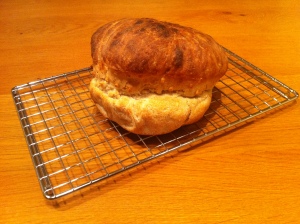
Batch two I shape into a round and make one big loaf which I cook for about 30 minutes until it sounds hollow when I tap it. As you can see from the first picture, I mustn’t have shaped it properly as the ball split as it rose and left me with a loaf shaped like a Muppet’s mouth. Also you can see in the second image, there was lots of air in the top, but it was dense in the bottom. It was still a bit claggy inside so needed longer in the oven- but it was very dark on top and the traditional tap test did suggest that it was done. I’m not sure how else I can test that bread is done? Putting aside that it was slightly undercook, again the taste was good.
So in the end, the method worked well for the baguettes and the flavour was good. However, It felt alien, slapping the dough around like that, and I never got it silky and smooth like the author said should happen. In the book it says you can knead using this method in 5 minutes when you get the hang of it. I just can’t see how that would be. So for me it is a case of good flavour but not a technique which I am comfortable with.
Up Next: Day 2- Dry Yeast
Cracking Bread day 2 will take place on Wednesday 11th (we need a day to eat the baguettes before cooking any more!). I will be making a loaf using recipe and method from the River Cottage Bread Handbook. Day 3 will be Friday 13th and sourdough from Moro.
If you have any tips or your own experiences of real bread, I would love to hear them.
Until Wednesday, happy baking to you all!


0 comments